

I just love cake stands, but sometimes I don't want to pay a high price for them, unless they go on sale for super deal - only then will I think about it.
But with Valentines Day is tomorrow and I wanted to bake a cake and display it, I didn't have anything remotely that would tie into the Valentines 'RED' theme. So last week as I made my monthly visit to the thrift store to see what great finds I could find, I picked up some ceramic plates and candlesticks.
If I couldn't find a reasonable Cake Stand in the color I wanted for a great cheap deal - then I would make one.
And that's exactly what I did.
These are so easy to make, you'll be making one for every holiday or just because :)
I will take pictures tomorrow with my Cake displayed on one :) But for now I'm displaying some treats and flowers.

Here is what I picked up from the thrift store, total = $4

I picked these plastic plates up from Target on sale, total for all 4 = $3

Use some E6000 and a candlestick


Apply some glue around the top of the candlestick, then set it onto the bottom of your plate, Leave to dry overnight.
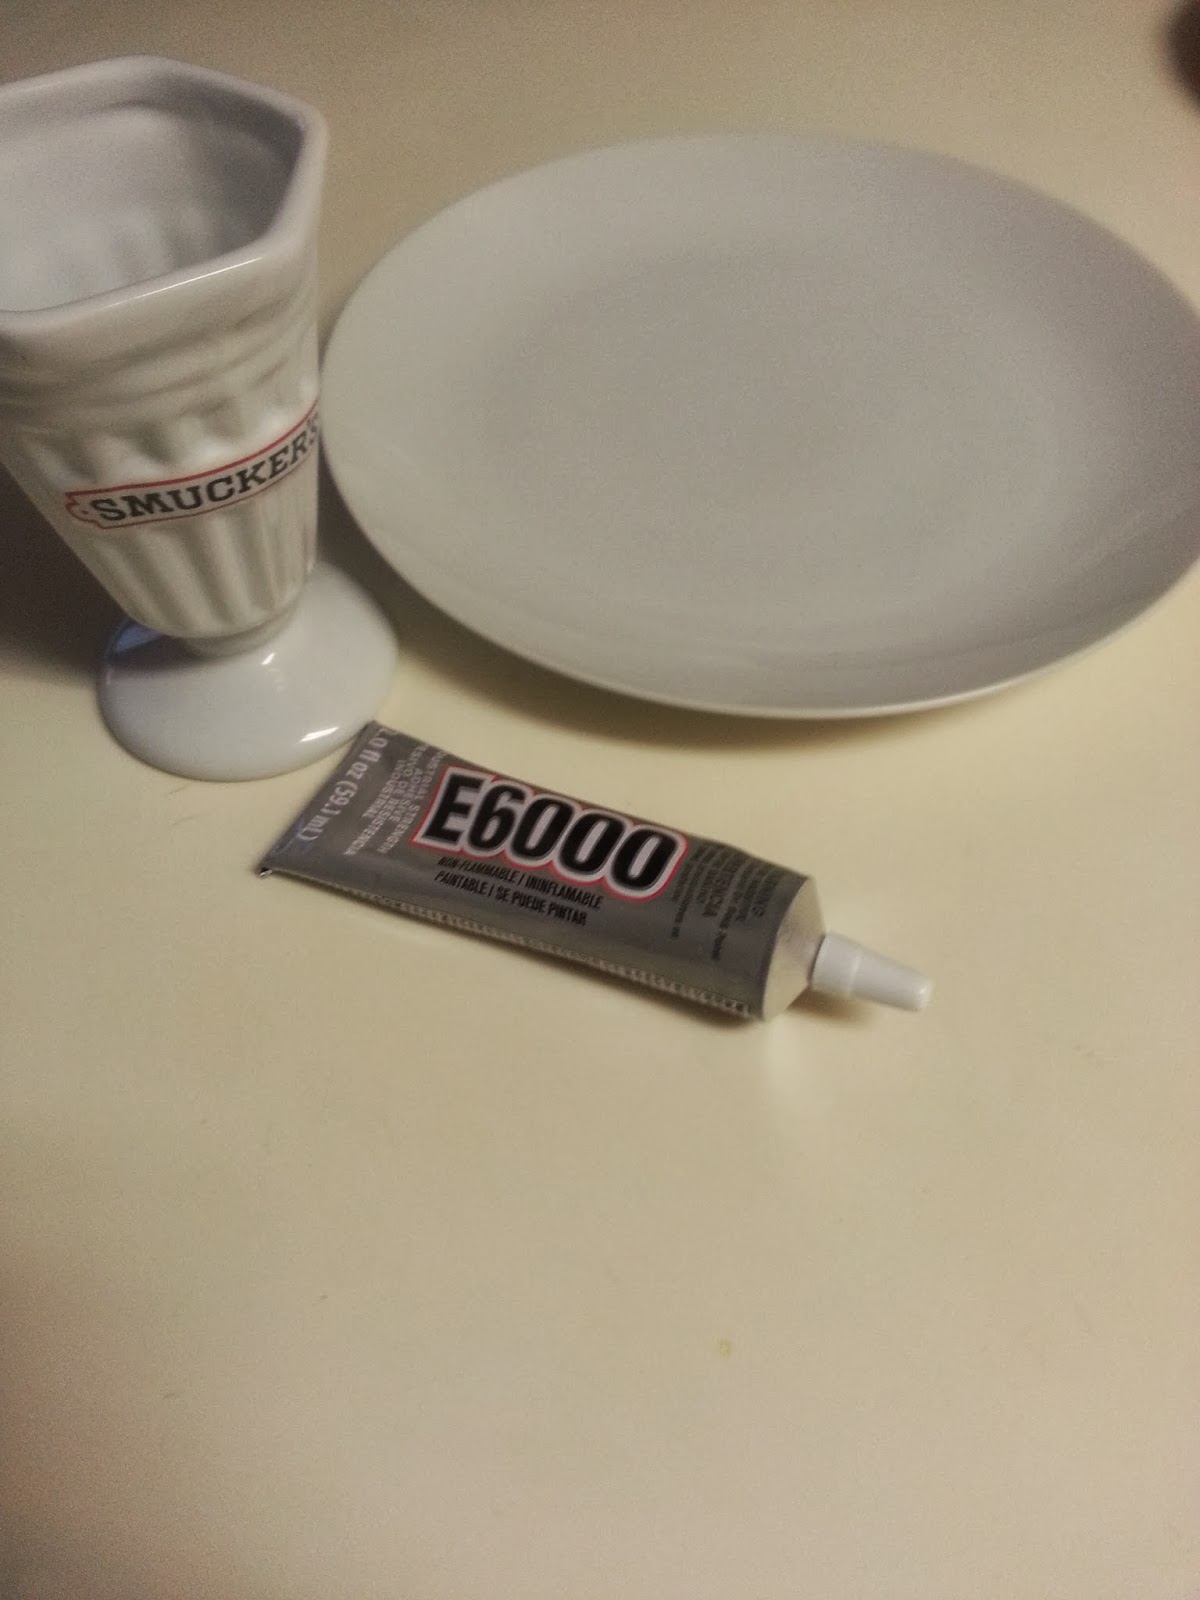
Now for this one, I found some ice cream sundae's holders, and I used a white plate. Glue the bottom of the sundae dish to bottom of plate - leave to dry over night.


Once they were dry, I used Rustoleum 2X cherry red and gave them about 5 coats. As I don't want the Smuckers logo, to show.

For the glass ones, all I did was glue a candlestick to bottom of dish. For the black stand, I used a bottle and glass plate, glued them together & sprayed it a flat black. I also did a small white stand, suing a small plate and a wine glass, did the same, glue ad spray.
And here are my various Cake stands or whatever you want to use them for Stands.
You can even stack them.


This is my plastic plate and candlestick.
With this one you can place food right on top.

With these ones, if using food product, I would place a paper doily or a thing cardboard bottom, that way you won't scrap the paint off when cutting a slice of cake. If you're using them for a cup cake display, then you would need to use anything as a liner.

You can display
ANYTHING!!


.jpg)


.jpeg)