 A Rustic, Shabby Chic Bathroom Shelf.
Our towel rail was plain and boring, and our bathroom had little appeal to it and needed some help. With being limited to what I can do, in our student housing..... I tried to work with what I had.
I started by measuring how big, I wanted the shelf to be, and it had to be small enough to be able to close the bathroom door, without it getting in the way.
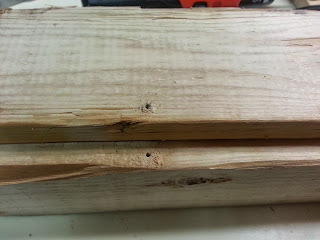
I measured the wood & made my cuts, Three equal lengths to make the sides & bottom, Then sanded down the edges, but not too much as I wanted it to look aged and weathered.
Here is the wood pieces, making sure they were the right fit.
Next I turned them over, lined them up and pre-drilled holes for the screws.
Next I cut my pieces & sanded that will go inside of the shelf, to make the dividers and the two end pieces.
The edges are quite rough, but I will sand them down with my electric sander. You can see in the picture below the dividers ready to have a dry test run.
They fit perfectly. I took them out and set them to the side.

Flipping the whole shelf so that the bottom faced up, I nailed through where I wanted the dividers to go.
 Here you can see the nail poking through, then I placed the divider over the nail, pushing it down hard, then flipped the shelf back over & hammered the nail all the way in.
Next, I nailed the sides to hold the dividers in place - doing it on both sides.
I sanded the whole shelf, but not too much,
As I wanted to keep the roughness to it. I wanted the weathered look.
Next I had, some cheaper $1 white & black spray paints from Walmart. I used this as my primer. Giving it three coats of black first, then once that had dried, then did the same using the white paint. ( I somehow lost the picture of the black paint on the shelf)
In this you can see the black peeking through. I sanded it lightly around the edges.
I'd purchased a towel rail from Walmart for $10 - I laid the template down on the underside of my shelf & made the marks where the rail was to go.
Measured to make sure the bar fit perfectly, then I drilled the fixings in place.
Make sure you screw the tightening screw to hold the ends in place, otherwise you'll have a wobbly towel rail.
I added some D-Rings on the back to hang it up.
Here I had some matching Drawer handles left over from making my Clock Wall Hanging, I used 3 on my shelf.
Here is our, new Bathroom Shelf with Towel Rail !!! I love the finished project.

 Now we have a place to hold our toothbrushes, without knocking them off the sink the whole time. I love how it turned out. It matches the Wall Clocking Hanging.


.jpg)


.jpeg)

My Name is Kelly Williams from Canada, i turn to a vampire any time i want to, I become a real vampire because of how people treat me, This world is a wicked world and not fair to any body. At the snack of my finger things are made happened. Am now a powerful vampire and no one step on me without an apology goes free. I turn to human being also at any time i want to. And am one of the most dreaded and respected person in my country. i am now also very famous and rich with the help of the VAMPIRES EMPIRE. i get what ever a want. i become a vampire through the help of my friend who introduce me into a vampire Kingdom by given me their email: templeofsuccessandlove1@gmail.com, if you want to become a powerful and a real vampire kindly contact the vampire kingdom on their email: templeofsuccessandlove1@gmail.com for help. it is real. Contact them today. templeofsuccessandlove1@gmail.com.
ReplyDelete